Abstract: This paper analyzes the process characteristics of the mobile phone charger casing, and introduces the working process of the injection mold structure and the mold of the cover of the mobile phone charger. The design method of the injection mold structure of the mobile phone charger housing is introduced. The material selection and heat treatment process of the mold core parts, the structural elements of the plastic parts of the mobile phone charger casing, the selection of the dimensional tolerances and precision of the plastic parts, and the calculation method of the volume and quality of the plastic parts are analyzed and elaborated. The structural feature of the injection mold design of the mobile phone charger housing is a three-part injection mold in the form of a dot gate, which is a lateral core-punching injection mold. After production verification, the mold structure is cleverly designed, easy to operate, long service life, and the plastic parts meet the technical requirements.
Keywords: mobile phone charger housing injection mold slider core
1 Plastic parts process analysis
1.1 Structural elements of plastic parts
As shown in Fig. 1 and Fig. 2, the plastic parts have many holes and bosses in the inner cavity, and the structure is complicated. The plastic part is an outer casing of the mobile phone, and requires certain strength, rigidity, heat resistance and wear resistance. At the same time, as a mobile phone charger, insulation must be satisfied. Combined with the above requirements and economic factors, the plastic parts are made of ABS plastic.
The draft angle is sufficient to facilitate the demolding of the plastic part, so as not to scratch the surface of the product during the demolding process, and its size depends on the shrinkage rate of the plastic. The orientation of the draft is determined by the size of the inner and outer dimensions of the molded part. The inner hole of the plastic part is subject to the small end of the core, the size meets the requirements of the drawing, the slope is marked along the shape expansion direction, the shape of the plastic part is based on the big end of the cavity, the size conforms to the requirements of the drawing, and the slope decreases along the shape. Out. It is required that the plastic part remains on the core after the mold is opened, and the draft angle of the surface of the plastic part should be smaller than the draft angle of the outer surface. According to the performance of ABS, the draft angle of the core is taken as 1o.
(2) Reinforcement.
In order to make the plastic part have a certain strength and rigidity, it can avoid the formation defects caused by the wall being too thick, and two reinforcing ribs are added between the dimples and the outer wall in the middle part of the plastic part, and the thickness is 2.5 mm.
(3) Rounded corners of plastic parts.
In order to prevent the stress set from being generated outside the corner of the plastic part, it is necessary to adopt a rounded corner transition at the corner or internal joint of the plastic part, and the inner and outer diameters are all taken as R5mm. The shape of the plastic part is very complicated, there is no regular outer surface, and there are many screw columns and reinforcing ribs inside, which makes the demolding force increase, and the lower plane of the plastic part has only 1mm step. The screw column is broken, making the injection molding process impossible. Therefore, a push rod must be provided near the screw column and the rib to push out the plastic part.
(4) The wall thickness of the plastic part.
The wall thickness of the plastic part will have a great influence on the molding, cooling and deformation of the plastic part. Uneven wall thickness of plastic parts will lead to uneven curing and shrinkage of various parts, and defects such as pores, cracks and internal stress are easily generated. According to the material, structure, strength and other requirements of the mobile phone charger housing, the wall thickness is 2.5mm.
(5) Hole.
The position of the various holes in the product should be set as far as possible in the part which does not weaken the mechanical strength of the product, and the shape of the hole is also required to not increase the complexity of the mold manufacturing process.
(6) Support surface.
It is unreasonable to use the entire bottom surface of the product as a support surface because the product is slightly warped or deformed to make the bottom surface uneven. A raised frame or foot (three or four points) is usually used for support. When there is a reinforcing rib at the bottom of the product, the end of the rib should be about O.5 mm lower than the supporting surface.
1.2 Plastic parts dimensional tolerance and accuracy
The product has a length of 140 mm, a width of 80 mm, a maximum of 60 mm, a thickness of 83.6 g, and a roughness value of RaO.06 mm. The main factors affecting the tolerance of plastic parts are: mold manufacturing error and wear error, especially manufacturing and assembly errors of molded parts, wear in use, fluctuation of plastic shrinkage, changes in injection process conditions, shape of plastic parts and flash Fluctuation in thickness, deviation from slicing, and dimensional changes in the finished product. The plastic parts of the top cover of the mobile phone charger are selected to have a dimensional accuracy class of 6 and a tolerance of GB/T14486-93 ft.
2 mold design points
1.1 Determination of the plan
Solution 1: 1 cavity and 2 cavity, the plastic parts are placed in parallel, and the directions are opposite to laterally draw the core. The gate is placed on the upper surface of the part, and the guide rod and the spring are used to ensure that the first parting surface is separated between the fixed mold plate and the intermediate plate, and the aggregate is first broken. The second part is divided and separated between the movable platen and the intermediate plate to take out the article. This type of division is conducive to mold processing, injection, exhaust, demoulding, and at the same time makes the operation simple and convenient.
Option 2: 1 mold 2 cavity, two plastic parts are placed in parallel, the opposite direction for lateral core pulling. The gate is located on the lower surface of the part, and the gate is inserted from the side of the push rod to form a latent gate. However, due to the high product, the flow path is too long, and it is easy to have insufficient pouring. The use of the fixed-length pull plate type automatically peels off the aggregate and products. However, the product is a shell with a step on the lower surface, and the addition of two push plates lengthens the originally long flow path, and the possibility of insufficient pouring is greater.
Option 3: 1 mold 2 cavity, two plastic parts are placed in parallel, the opposite direction for lateral core pulling. The hot runner can eliminate the generation of waste, but the long heating of the flow channel is more complicated, and the fluidity of ABS plastic is better to cause turbulence. Switch to PP and other plastics that meet the hot runner, not only the plastic properties can not be satisfied. Functional requirements and increased production costs.
Combining the feasibility and economy of plastic injection, compare the above three schemes, this design choice scheme one.
2.2 Determine the number of cavities and the number of cavities
The separable contact surface on the mold for taking out the product and pouring the system aggregate is called a parting surface. When designing the product, the shape and position of the parting surface during molding must be considered, otherwise the mold cannot be formed. Because the lateral clamping force has a small locking force, for a large-scale project with a large projection, the parting surface with a large projection area should be placed on the main plane of the mold clamping of the moving and fixed mold, and the projection area is small. The parting surface is used as a lateral parting surface. The mold is divided into large planes of the plastic part. A 1-mode 2-cavity structure is employed.
2.3 Cavity, core structure
(1) Structural design of the cavity: This design uses an embedded cavity structure. This structure is widely used in molds for small and medium-sized plastic parts. The processing method can be performed by ordinary machining, numerically controlled machine tools, electric spark, electroforming, and the like. An integral cavity is embedded in the cavity fixing plate, and the embedded cavity material can be polished by carburizing and quenching with low carbon steel or low carbon alloy steel.
(2) Structural design of the core: The core is a molded part used to form the inner surface of the plastic product. The core of the mold adopts a combined core structure. The use of this structure can save high-quality mold steel, is convenient for machining and heat treatment, and also facilitates the accuracy of dynamic mold and fixed mold position, which is beneficial to the implementation of core cooling and exhaust.
2.4 Gate design
The gate is a key part of the gating system. The shape, number, size and location of the gate have a significant impact on the quality of the part. Its main functions are two: one is the passage through which the plastic melt flows; the other is the timely solidification of the gate to control the dwell time. The arc is machined before the restrictive section of the gate, which is beneficial to delay the freezing of the melt at the gate and is beneficial to the feeding in the opposite cavity. According to the structural requirements of the product, the design uses a dot gate form.
Point gate parameters: from the recommended value take the gate diameter d = 1.2mm, the gate length L = 1mm.
2.5 Design of cold pockets
When the shunt is designed to be relatively long, a cold pocket is left at the end. Its function is to collect the forward cold material of the plastic melt to prevent the front cold material from blocking the gate or entering the cavity, resulting in insufficient filling or affecting the welding strength of the product or forming cold defects. The commonly used cold material points mainly include cold material points with work-type pull rods, inverted cone-shaped cold material points with push rods, round cold material points with push rods, and ball-shaped cold material points with pull rods. , the mushroom-shaped cold material hole with the vertebral rod, and the main runner extended cold material point. This design uses a cold material hole with a work-type pull rod, which is characterized by easy processing and is advantageous for removing the sprue waste when demolding, as shown in Figure 3.
The parting surface of the mold is selected on the large plane of the plastic part, 1 mold and 2 pieces. In order to reduce gate scars, point gate injection is used. The structure of the mold is shown in Figure 4.
1 movable mold seat plate 2 8 12 21 24 26 31 36 screw 3 14 18 guide post 4 16 guide sleeve 5 spacer 6 support plate 7 convex template 9 concave template 10 limit pull plate 11 limit cylindrical pin 13 28 spring 15 Mold plate 17 convex model core insert 19 push rod fixing plate 20 push plate 22 23 push rod 25 limit block 27 spring washer 29 slider 30 wedge block 32 oblique guide column round plate 33 oblique guide column 34 positioning åœ 35 Sprue sleeve 37 pull rod 38 reset rod 39 limit nail
The working process of the mold: after injection molding, when the mold is opened, under the tension of the spring 13 and the condensing material pulling rod 37, the I-I surface is once divided, and the fixed mold bottom plate 15 is separated from the concave chess board 9 and condensed. The material is left on the side of the concave template 9; the concave template 9 drives the slider 29 to move backward, and under the action of the inclined guide column 33, the slider 29 moves laterally along the guide rail 7 on the convex template 7 to complete the lateral core pulling operation. When the end of the limiting cylindrical pin 11 hits the end of the limiting pull plate, the concave template 9 stops moving, and once the first parting is finished, the slider 29 and the convex template 7 continue to move, starting from II-II and secondly dividing. Type, firstly pull the breakpoint gate, under the action of the clamping force of the plastic part to clamp the punch, the plastic part continues to move with the convex model core 17. When moving to a certain distance, the plunger of the injection machine pushes the push rod fixing plate 19, and the push rod pushes the plastic member out of the moving mold, and the pulling rod 37 pushes out the suspect.
When the mold is closed, the movable mold moves to the II-II parting surface to engage the core and the cavity. The push rods 22, 23 and the reset lever 38 are first reset; continue to move, when the slider 29 is under the action of the wedge 30 and the inclined guide post 33, a relative motion is generated, and the pressing slider 29 generates lateral movement along the guide rail, forcing the slider to be reset. When the concave die plate 9 and the fixed mold base plate 15 are completely engaged, the mold clamping is ended.
Start the next work cycle process.
4 Conclusion
The set of molds is cleverly designed with the pulling rod 37, which ensures that the aggregate remains on the side of the concave template 9 during the first parting, and the aggregate is automatically detached when the ejector pushes the push rod fixing plate 19, thereby achieving a soaking shot. Full automation of the plastic parts being ejected improves production efficiency. The guide rails on the slider 19 serve as a guiding function for easy installation on the convex template. Since the plastic part is a thin and uniform plastic part, and the punch part has many holes and bosses, and has a large covering force, in order to ensure the introduction of the plastic part, 36 putter water balance is designed. Push the power. It has been proved by production practice that the opening and closing action of the auxiliary mold fully meets the design requirements and is suitable for mass production.
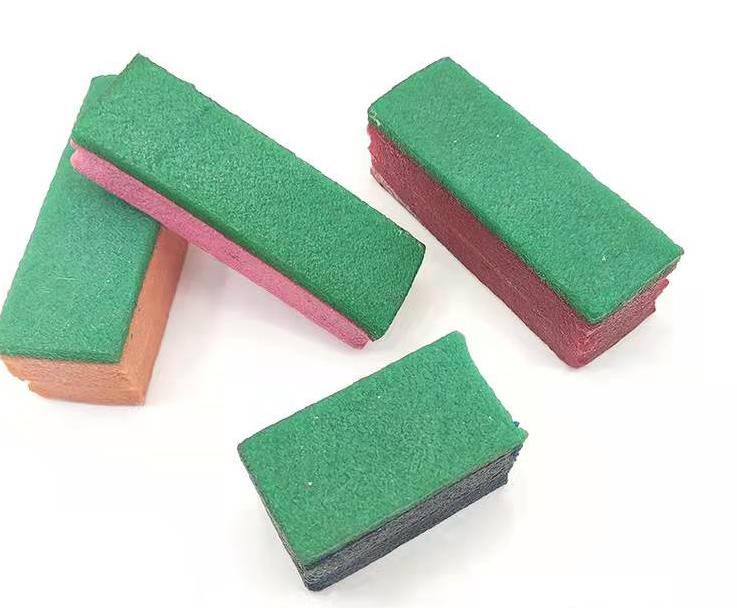
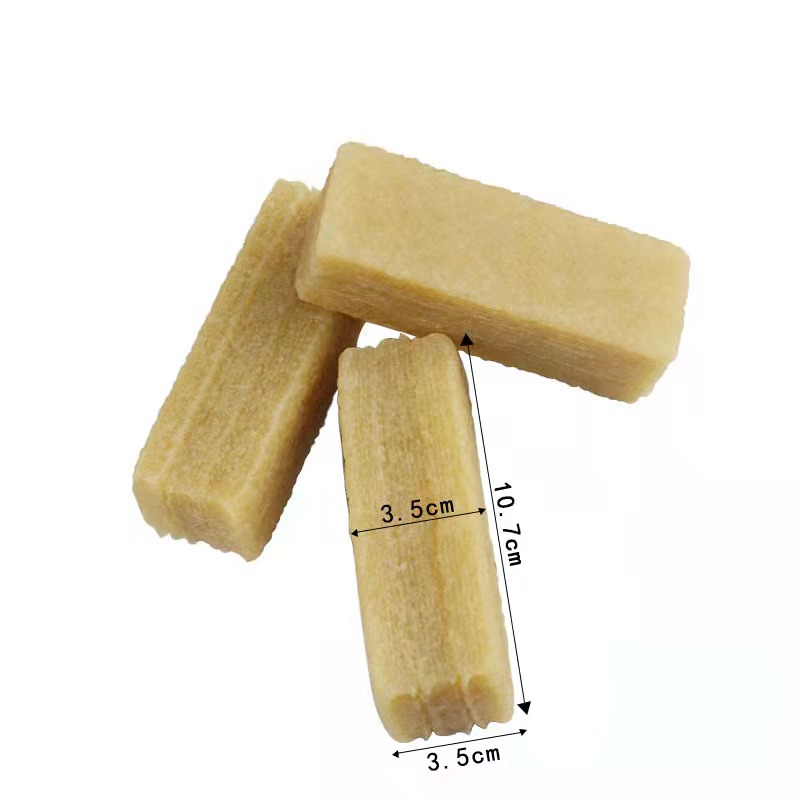
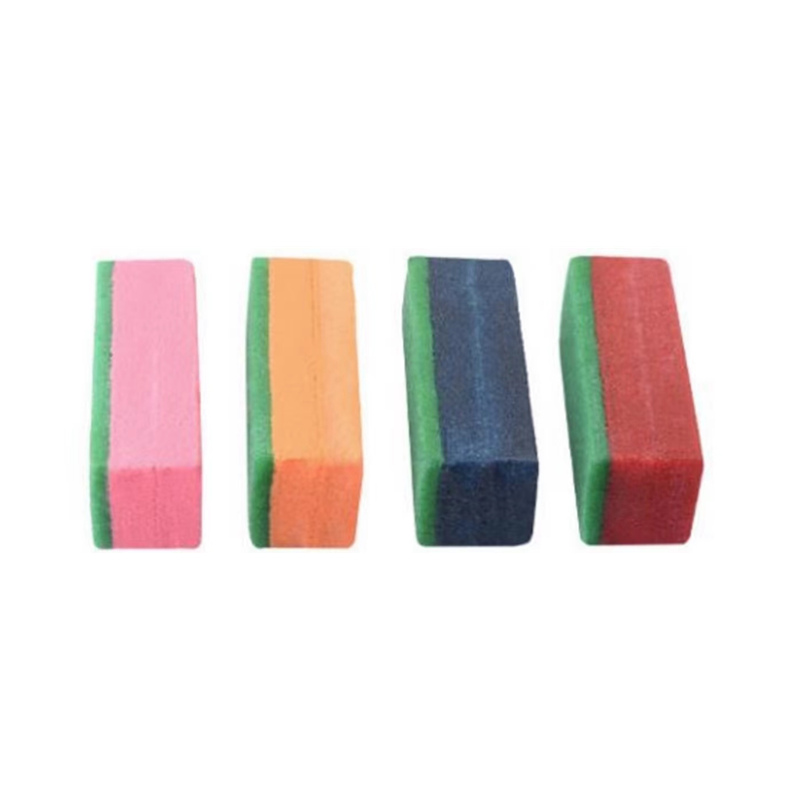
The main product related to abrasives is the abrasive belt cleaning block
Main features
1. For maximum protection in any shop
2. Removes accumulated particles
3. Increases the lifetime of sanding belts and discs up to 500%

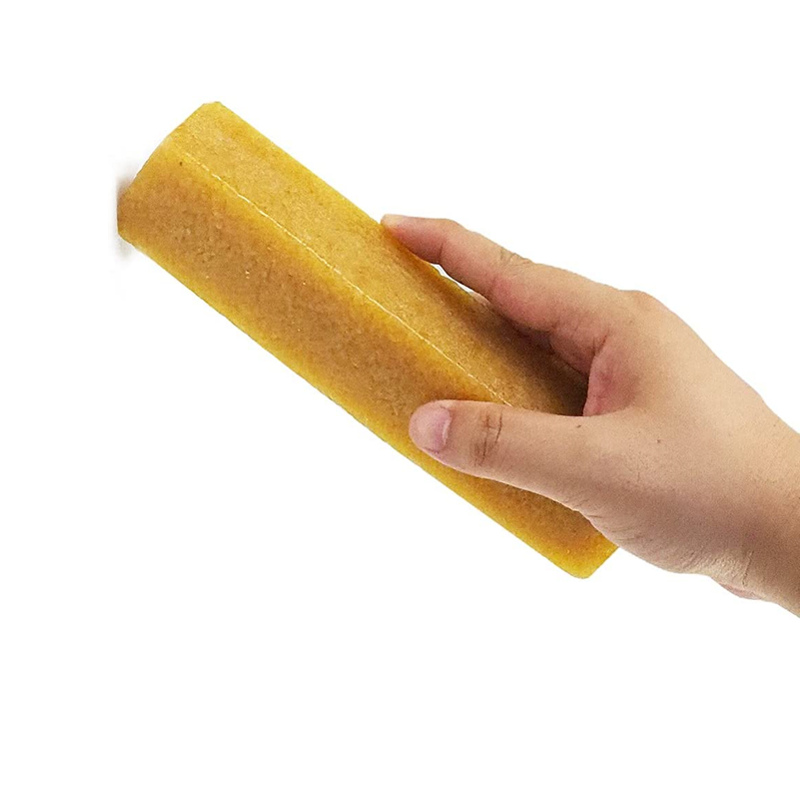
Our abrasive cleaner sticks are the easiest solution for cleaning/unloading abrasives. Increase the life of new sanding belts and discs up to 10 times as long with our quality abrasive belt cleaners. Simply press the cleaner stick lightly against moving sanding belts and discs to remove clogged-up pitch and saw dust. Improves the finish quality and prevents burns and marking. Cuts down the frequency and costs of belt replacement.
Remove gum buildup on your sanding discs and belt sanders with this amazing Sanding Belt cleaner. The sanding belt cleaner instantly cleans sanding belts of all grits and removes the accumulated particles that lodge between the abrasive grains and cause a dull cut. Increase the life of sanding belts and discs up to 500% with this sanding belt cleaner
We distributes and wholesales various brands of Abrasive Sanding Disc, Cutting Wheels , Abrasive Flap Disc , Flap Wheels , Flap Disc Backing Pad, Flap Disc Adhesive , Abrasive Machine and Surface Conditioning Product etc, and enjoy a high position among consumers.

Product Description
This crepe-rubber belt cleaner quickly removes gum and grit from belts and discs without damage. Just press the cleaning block against your sanding belt or disc until it is clean. That is all there is to it. Extend the life of your belts or discs with this innovative natural cleaner.
Clean sanding belts and discs for optimal performance
Abrasive belt & disc cleaner removes residue to unclog loaded sanding belts or discs. The easy-to-use cleaner comes in handy on the job site or at home for anyone from professionals to do-it--yourself, and using the cleaner will extend the life of the sandpaper and orbital machine or belt sander - whichever you use. Run the abrasive cleaning stick across the belt or disc to remove unwanted gunk and make a smooth surface for optimal performance.

Expand the life of your belt sander, orbital machine and sandpaper with the Abrasive belt & disc cleaner. It removes residue to keep it from clogging sanding belts and discs.
1. remove residue on sanding belts and discs with Abrasive belt & disc cleaner
2. abrasive cleaning stick
From the Manufacturer
The abrasive belt & disc cleaner is for all-purpose, wet or dry sanding. The flexible rubber construction works better.

Rubber Cleaning Block,sanding disc rubber cleanning,Abrasive Cleaning Block,Abrasive Paper,Abrasive Related Products
Zhengzhou Jiading Abrasive Manufacturing Co.,Ltd , https://www.jd-abrasives.com